By the NailMoodLab Editorial Team
Nail art budget planning is the process of breaking down an inspirational manicure concept into individual visual components—base coat, color complexity, dimensional charms, and intricate hand-painted artwork—so you can match the design to your available appointment time and spending limit before sitting in the salon chair. Rather than abandoning an ambitious reference image when salon pricing or chair time exceeds your boundaries, strategic planning ranks each design element by visual priority and scales complexity down to accent nails. By estimating base service fees, booking adequate technician time slots, and confirming add-on pricing tiers in advance, clients can achieve a cohesive, elevated aesthetic without appointment-end budget surprises or rushed, incomplete sets.
+----------------------------------------------------------------------------------------------------+
|                               NAIL ART DETAIL RANKING HIERARCHY                                    |
|                                                                                                    |
|  [ LEVEL 1: THE CORE MOOD & PALETTE ]  -->  Base gel shade, finish (matte/gloss), dominant tones   |
|  *Foundation: 100% preserved in every budget tier (Included in base service / lowest art tier)*    |
|                                                                                                    |
|  [ LEVEL 2: THE PRIMARY STATEMENT ]    -->  Signature motif placed on 2 to 4 accent nails          |
|  *Impact Zone: Thumbs and ring fingers capture 80% of visual attention at 20% of art surcharge*   |
|                                                                                                    |
|  [ LEVEL 3: SUPPORTING TEXTURES ]      -->  Chrome glaze, micro-glitter cuffs, or simple lines     |
|  *Bridge Elements: Carried across non-accent nails only if time and tier allowances permit*        |
|                                                                                                    |
|  [ LEVEL 4: HIGH-MAINTENANCE LUXURY ]  -->  Hand-painted portraits, sculpted 3D gel, heavy gems    |
|  *First to Drop: Adds 45+ minutes and $40-$100; omit first when balancing time or budget*          |
+----------------------------------------------------------------------------------------------------+
The Salon Reality: Why Your Reference Image Costs More Than You Expected
Most clients do not encounter budget friction at the salon because nail technicians overcharge; they encounter friction because social media reference images rarely disclose the mechanical labor behind the set. A photo saved from Instagram or Pinterest often represents a two-hour bespoke masterclass involving structural builder gel, multiple rounds of precision flash-curing, hand-painted fine-line illustration, and individually placed charms.
When a client books a standard 45-minute "gel manicure" slot and presents an intricate ten-finger editorial set, two immediate breakdowns occur:
- The Appointment Time Deficit: Independent nail technicians schedule appointments based on predictable time blocks. A standard gel manicure slot accounts only for nail shaping, cuticle cleanup, base preparation, two coats of solid color, and topcoat. If complex art requires an additional 45 minutes that was not reserved during booking, the technician must either decline the art entirely or rush through the work, resulting in sloppy lines and premature lifting.
- The Layered Surcharge Model: Salons structure their pricing around base services plus progressive art tiers. A client who expects a $50 service may be startled when cuticle prep ($45), gel extensions ($35), multi-color French tips ($25), chrome powder burnishing ($15), and encapsulated crystals ($20) total $140 at checkout.
Discussions in community forums like r/AllNails illustrate that negative "what I asked for vs. what I got" experiences stem primarily from mismatched time allocations and unclear scope rather than artistic inability. Understanding how salons bill for time and technique is the first step toward controlling your final bill.
The "Rank Before Simplifying" Framework
When facing budget or appointment constraints, the standard advice is often to "pick something simpler." This advice frequently leaves clients disappointed because random simplification strips away the very character that made the original design appealing.
A superior approach is ranking your reference details before simplifying. By isolating which elements create the emotional hook of the design, you can preserve the visual idea while drastically reducing execution time and cost.
Step 1: Identify the Visual Anchor
Look closely at your reference image. What caught your eye first?
- Was it the color story (e.g., a moody espresso gradient paired with creamy oat milk tones)?
- Was it the surface finish (e.g., a glazed donut chrome sheen or velvet magnetic shimmer)?
- Was it a specific graphic motif (e.g., delicate botanical florals, celestial stars, or abstract swirl lines)?
The visual anchor must be protected. If the color story is the anchor, you can use simple solid coats in those exact shades across eight fingers while confining complex graphics to two accent nails.
Step 2: Leverage the Accent Nail Formula
Decorating all ten fingers multiplies salon surcharges and chair time by a factor of five compared to an accent set.
Focusing your art on your thumbs and ring fingers delivers maximum everyday visibility:
- Thumbs are prominently visible to you throughout the day when typing, holding a phone, or driving.
- Ring fingers sit naturally in the visual center of your hand when gesturing or resting on a table.
By placing your Level 2 statement artwork on two to four fingers and coating the remaining nails in coordinating solid lacquer or negative-space sheer bases, you maintain the aesthetic identity of the set while cutting art fees by 60% or more.
Step 3: Swap Techniques, Not Aesthetic Themes
Many visual effects can be achieved through multiple technical methods that vary widely in cost and required appointment time:
- Instead of hand-painted French swirls on ten fingers: Opt for a subtle chrome powder glaze over a neutral base, or request a micro-French line on just two accent nails.
- Instead of multi-layered 3D builder gel flowers: Ask for flat, stamped floral motifs or delicate dot-tool petals that cure in seconds.
- Instead of full hand-painted checkerboards: Use clean negative-space diagonal blocks that require half the brushwork.
Nail Art Complexity, Time, and Price Matrix
Salon pricing structures vary by region, salon tier, and technician seniority. However, the operational relationship between complexity, appointment duration, and cost tiers remains remarkably consistent across the United States. Use this benchmark table to evaluate reference images before booking:
| Complexity Tier | Typical Design Elements | Additional Time Above Base | Estimated Art Surcharge | Best Suited For |
|---|---|---|---|---|
| Tier 0: Solid Foundation | Single-color gel, sheer jelly glaze, classic glossy or matte topcoat | +0 mins | $0 (Included in base) | Everyday professional wear, minimalist routines, strict budgets |
| Tier 1: Minimalist Accents | Single micro-dots at cuticle, clean foil flakes, chrome powder glaze, 2 simple accent nails | +10 – 15 mins | +$5 – $15 | First-time nail art clients, short appointment windows, subtle styling |
| Tier 2: Intermediate Detail | Micro-French tips, velvet cat-eye magnetic gel, geometric lines, negative space cutouts, 4 accent nails | +20 – 35 mins | +$15 – $35 | Seasonal transitions, polished event sets, balanced cost-to-impact ratio |
| Tier 3: Advanced Artistry | Intricate hand-painted florals, multi-color abstract swirls on 10 nails, tortoise shell encapsulation, ombré gradients | +40 – 60 mins | +$35 – $65 | Special occasions, design enthusiasts, dedicated artistic statements |
| Tier 4: Master & 3D Sculpting | Sculpted 3D character gel, heavy Swarovski rhinestone clusters, encapsulated dried flowers, pierced charms | +60 – 90+ mins | +$50 – $100+ | Editorial events, competition sets, long acrylic or gel-X extensions |
Note: Art surcharges sit on top of your salon's base manicure fee (typically $35–$65 for natural gel manicures, or $60–$110 for structural extensions or builder gel).
Step-by-Step Workflow: Planning Your Set Before Booking
To ensure you walk out of the salon with the exact design you envisioned at the price you budgeted, follow this structured five-step planning workflow:
[ Step 1: Collect & Deconstruct ]
       |
       v
[ Step 2: Digital Try-On & Shape Fit ]  <--- Test with NailMoodLab
       |
       v
[ Step 3: Define Must-Haves vs. Tradeoffs ]
       |
       v
[ Step 4: Send Structured Salon Brief ]
       |
       v
[ Step 5: Book Correct Art Tier Slot ]
Step 1: Collect and Deconstruct Reference Images
Gather two or three images that represent your goal. Instead of viewing them as unchangeable templates, write down the three core elements:
- Base length and shape (e.g., short squoval, medium almond).
- Primary background color (e.g., milky pink, sheer beige, dark cherry).
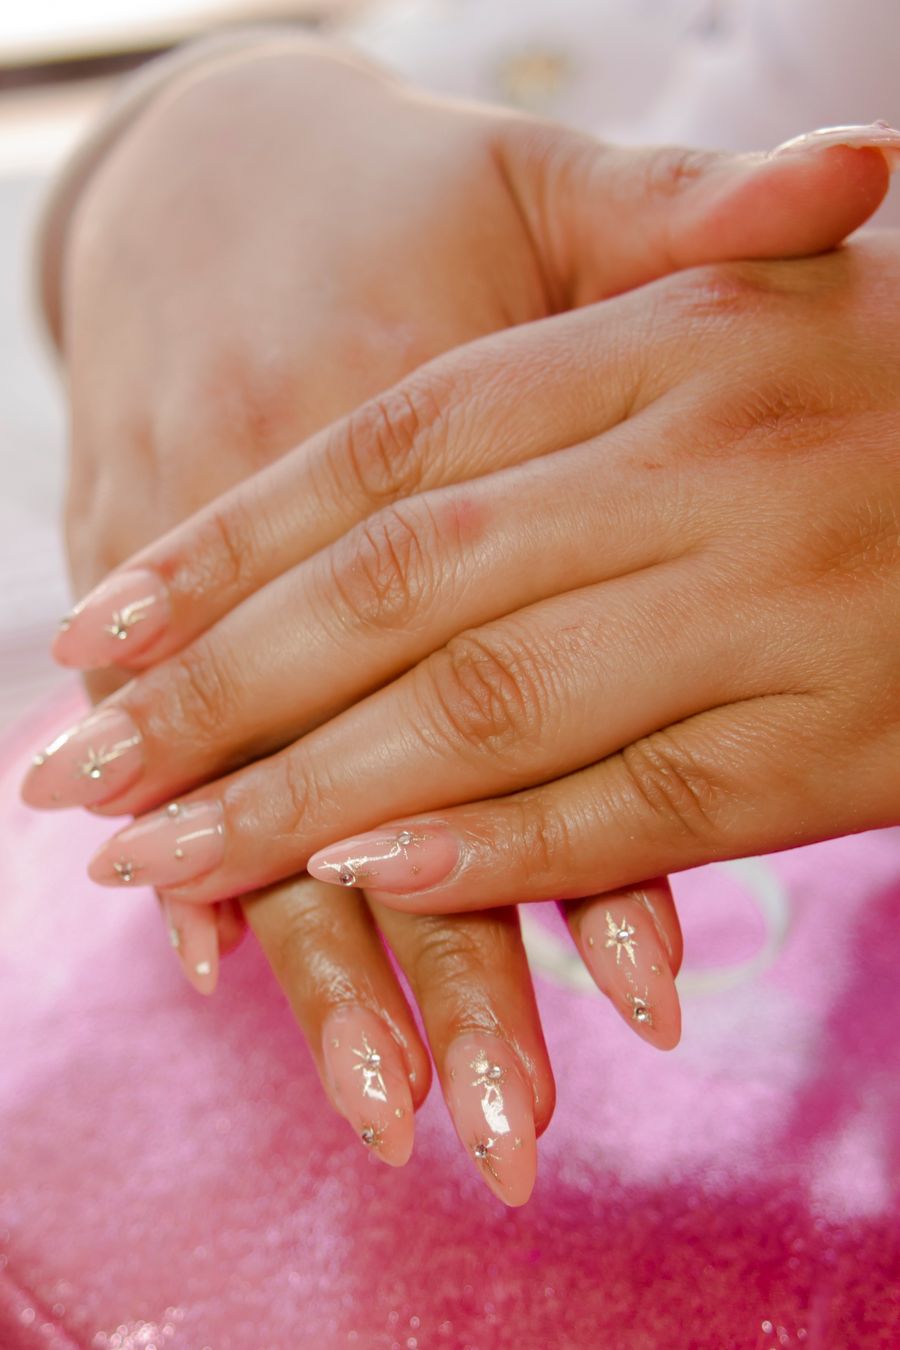
- Foreground detail (e.g., gold metallic lines, miniature stars).
Step 2: Test Proportions on Your Actual Hand Silhouette
A major point of failure highlighted in community discussions like r/Nails is that reference photos often feature long, slender nail beds that do not reflect the client's natural proportions. Art that looks airy on a long almond tip can appear overwhelming on a short, wide nail bed.
Before committing to a design, use a digital visualization tool:
- Open NailMoodLab to experiment with prompt-based design generation or explore the nail shape analysis tool to evaluate which silhouette flatters your natural cuticle and finger lines.
- Utilize the two-image virtual try-on to visualize color palettes and placement directly on a photo of your own hand.
- You can regenerate concepts, download high-resolution previews, share results with friends, or copy the direct URL for reference.
Digital Preview Boundary Notice: Virtual previews generated by digital tools serve as creative mood boards and proportion guides. They do not constitute a clinical nail assessment, mechanical fit guarantee, or a promise that your local salon stocks identical pigments, foils, or dimensional charms. Use previews as a shared visual reference to facilitate discussion with your technician.
Step 3: Separate "Must-Haves" from "Nice-to-Haves"
Create a firm list before contacting your technician:
- Non-Negotiable: "I want a sheer nude base with chrome powder glaze."
- Negotiable (Budget Dependent): "If time and pricing permit, I would like small hand-painted stars on both ring fingers; otherwise, a simple gold foil accent is fine."
Step 4: Send a Structured Brief When Inquiring
Do not simply send a picture with the message, "How much?" Salons appreciate clear communication that helps them estimate timing and pricing accurately.
Use this copyable consultation template:
Copyable Salon Consultation Script: "Hi [Technician Name]! I’m looking to book a manicure for [Date/Time]. I have an inspiration concept featuring a [sheer neutral base with chrome glaze], and I’d like to add [hand-painted star accents on just my two ring fingers]. My nails are currently [natural short / extensions needing infill]. Could you let me know which art tier or time slot I should reserve for this, and what the estimated total price range would be? Thank you!"
Step 5: Reserve the Correct Service Time Block
Always book the art tier recommended by the technician during your inquiry. If your salon uses online booking software (e.g., GlossGenius, Vagaro, Fresha), select both the base service (e.g., "Structured Gel Manicure") and the appropriate add-on (e.g., "Tier 2 Nail Art – 30 Minutes"). Never attempt to squeeze nail art into a basic booking notes field without selecting the add-on duration.
Real-World Case Study: Transforming a $130 Reference into a $70 Reality
To see the "Rank Before Simplifying" method in action, consider a common client scenario:
- The Inspiration Photo: A ten-finger set featuring long almond gel-X extensions, French ombré base, hand-painted tortoiseshell pattern on every nail, overlaid with 3D gold chrome borders and miniature freshwater pearl charms.
- The Salon Quote: Base Gel-X Extension ($85) + Full-Hand Tortoiseshell Art Tier ($40) + 3D Chrome & Pearl Add-on ($30) = $155 total (2 hours chair time).
- Client Constraints: Maximum budget of $75–$85; maximum available appointment time of 75 minutes.
The Prioritization Breakdown:
- Identify the Core Visual Hook: The rich, warm caramel tones of the tortoiseshell finish were what the client loved most. The heavy 3D gold borders and pearls were secondary decorations.
- Apply the Accent Formula: Tortoiseshell requires layering clear blooming gel, amber jelly lacquer, and brown/black pigment with multiple cures. Doing this across ten fingers consumes 45 minutes of art time. Doing it on just the two ring fingers takes only 10 minutes.
- Coordinate the Remaining Nails: Coat the remaining eight nails in a matching solid espresso brown or warm caramel glaze (standard gel manicure pricing).
- Substitute Costly Techniques: Replace the delicate 3D sculpted gold borders with a fine gold glitter cuff at the base of the two accent nails.
The Final Outcome:
- Structured Natural Gel Manicure ($50) + Tier 1 Accent Art for 2 Nails ($15) + Gold Cuff Detail ($5) = $70 total (65 minutes chair time).
- The Result: The client leaves with an elegant, cohesive set that immediately captures the autumnal tortoiseshell aesthetic, stays within their 75-minute lunch break, and costs less than half the original quote.
Common Planning Pitfalls and Operational Failure Modes
Even prepared clients can hit unexpected roadblocks. Watch out for these four frequent planning missteps:
- Forgetting Existing Product Removal: If you currently have gel polish, dip powder, or acrylics on your nails, safely removing them takes 15 to 30 minutes. If you do not book a "Gel/Acrylic Removal" add-on, your technician may be forced to use your reserved nail art time just to clean your nail plates.
- Assuming Nail Art is Priced Solely by Length: While long extensions require more structural product, nail art pricing is primarily dictated by technician dexterity and curing cycles. Intricate line work on short natural nails often requires equal or greater precision than on long extensions.
- Bringing Single-Perspective Flat Reference Images: Photos taken from extreme artistic angles can hide structural flaws or create optical illusions about shape. Whenever possible, bring references that show the nail head-on and from the side.
- Surprise Add-Ons at Checkout: Always verify finish fees before application begins. In some salons, matte topcoat, French tip smile lines, cuticle oil treatments, or specialty magnetic cat-eye tools carry modest separate surcharges ($3 to $10). Ask upfront: "Does this set include the final topcoat finish in the quoted tier?"
Structural and Salon Limitations to Keep in Mind
A successful salon appointment relies on mutual respect between client expectations and physical reality:
- Technician Specialization: Nail artistry is a broad field. Some technicians are structural masters specializing in Russian cuticles and razor-sharp acrylic apexes, while others are miniature painters who excel at hand-painted portraits. Review your technician's portfolio on Instagram or their booking site to ensure their actual work aligns with your aesthetic.
- Studio Color and Product Inventories: Salons work with specific professional product systems (e.g., Bio Seaweed Gel, Kokoist, Aprés, The GelBottle). A technician cannot replicate an exact bespoke shade if they do not stock that specific pigment line, though they can usually mix custom jelly shades to match closely.
- Natural Nail-Bed Anatomy: Your nail bed length, lateral sidewall curvature, and finger shape are unique. An almond shape on a wide nail bed will naturally appear different from an almond shape on an elongated, narrow nail bed. Respecting your natural anatomy yields a more durable, balanced manicure.
Pre-Booking Client Checklist
Review this quick checklist before submitting your next salon appointment request:
- [ ] Current State Assessed: Do my nails need existing product soaked off or repairs on broken sidewalls?
- [ ] Visual Anchor Isolated: Have I decided which element (color, texture, or motif) is the core feature of my design?
- [ ] Proportions Checked: Have I previewed the shape and art balance against my natural length using NailMoodLab?
- [ ] Accent Strategy Selected: Am I applying detailed artwork to all ten fingers, or focusing on my thumbs and ring fingers?
- [ ] Time Slot Reserved: Have I booked both the base manicure and the necessary art duration add-on?
- [ ] Price Verified: Did I confirm the total estimated range, including prep, art tiers, and specialty finishes?
Frequently Asked Questions
How do nail salons typically calculate nail art pricing?
Salons generally use one of three pricing models: tiered art blocks (e.g., Tier 1 Simple at $15 for 15 mins, Tier 2 Medium at $30 for 30 mins), per-nail pricing (e.g., $5 to $10 per accent nail depending on detail), or flat hourly rates (common among independent private-suite nail artists, ranging from $60 to $120+ per hour for all-inclusive time). Tiered and per-nail structures are the most common in walk-in and boutique street salons.
What is the most cost-effective way to get salon nail art on a budget?
The single most effective budget strategy is the two-nail accent rule. Selecting a solid gel color for eight fingers and reserving hand-painted artwork, chrome powder, or glitter cuffs for your ring fingers (or thumbs) provides immediate visual impact while keeping you within base-tier art pricing.
Can I show an AI-generated nail art image to my nail technician?
Yes, provided you present it as an inspirational concept rather than an exact blueprint. AI-generated nail designs can provide fantastic ideas for color harmony, thematic moods, and graphic placement. However, AI images often display physically impossible features, such as zero-thickness 3D elements, floating gems without adhesive bases, or hyper-blended airbrush gradients that cannot be cured in standard gel systems. Walk through the image with your technician and ask: "Which elements of this concept can we realistically translate to my natural nails today?"
Does NailMoodLab require a paid subscription to test nail designs?
No. Paid subscription checkout is currently disabled while system integrations undergo testing. You can use NailMoodLab freely in your web browser to generate prompt-based concepts, experiment with virtual try-on using your hand photos, explore nail shape recommendations, and download or share your reference previews without entering payment information.
Plan Your Next Manicure with Confidence
You do not need an unlimited beauty budget to wear expressive, high-end nail art. By identifying the visual anchor of your favorite references, scaling detail across strategic accent nails, and communicating clearly with your technician before booking, you can eliminate appointment stress and avoid checkout surprises.
Take action on your next set:
- Save your favorite inspiration images and identify the one element you love most.
- Visit NailMoodLab to experiment with color prompts, check shape recommendations on your hands, and download a clear reference card.
- Use the copyable consultation script above to message your nail technician, verify required appointment time, and lock in your price before you sit in the chair.
- Once verified checkout and ongoing subscription plans are officially launched, integrate NailMoodLab into your permanent seasonal styling workflow.
Sources and Community References
- Reddit r/Nails Discussion on Nail Shapes and Hand Fit — Community insights on tailoring shapes to natural nail anatomy.
- Reddit r/AllNails Reference vs. Result Analysis — Operator and client discussions on salon time management and realistic reference translation.
- Reddit r/SomebodyMakeThis Community Shaping Request — User discussions highlighting the need for digital try-on tools prior to salon visits.