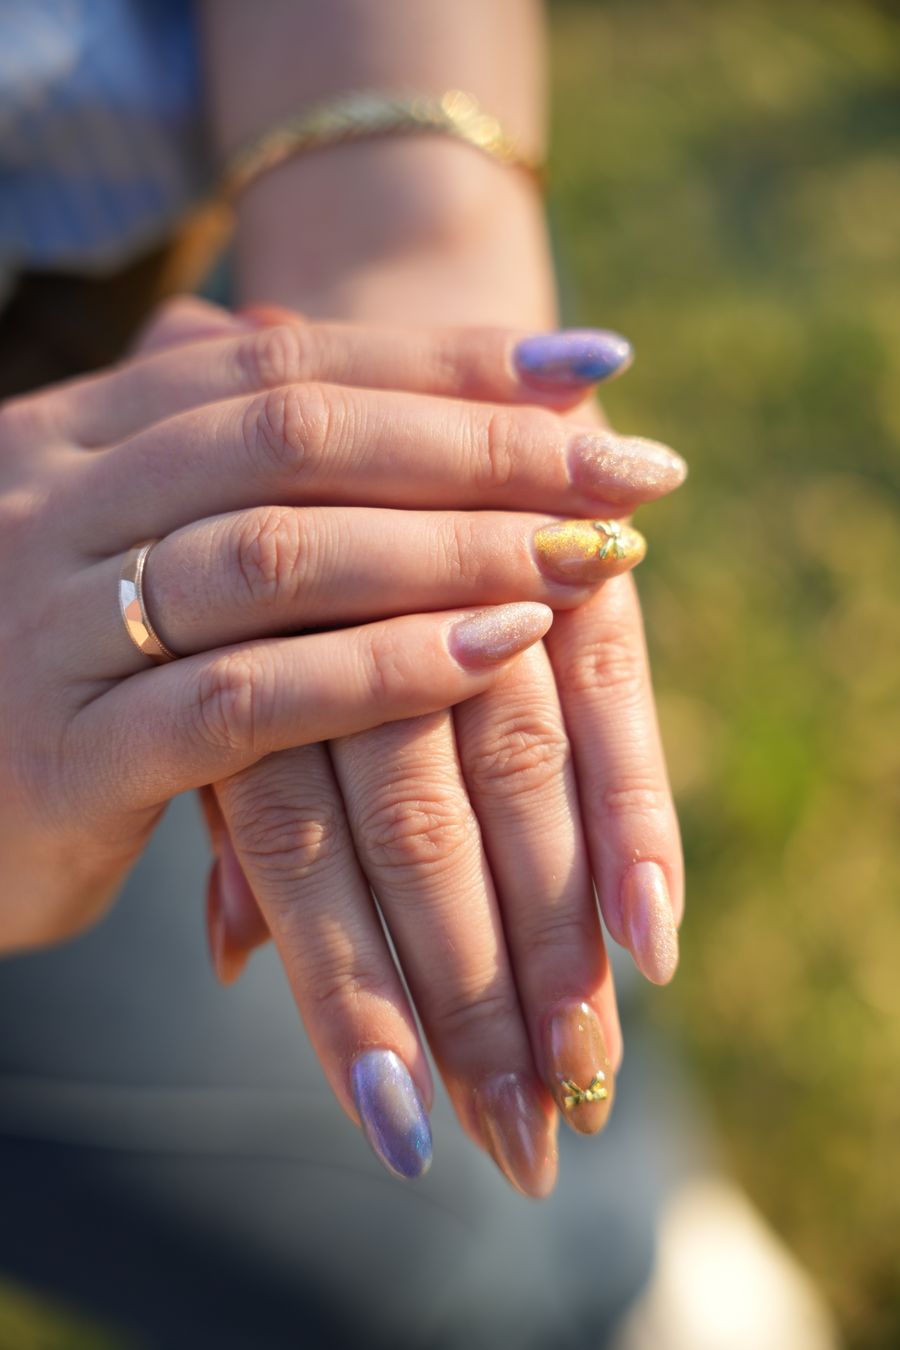
A French tip for short nails is a manicure technique that adapts the classic white-band design to compact nail plates by reducing tip thickness to a delicate micro-line, matching the smile curve to the natural free edge, and balancing color contrast. When applied to short lengths, traditional thick French bands consume too much surface area, cutting the nail plate in half and making fingers appear wider. By keeping the tip width between 10% and 15% of the total nail length and selecting a semi-sheer base that complements your skin tone, you create an optical elongation effect that flatters natural nails and short overlays alike.
┌─────────────────────────────────────────────────────────────┐
│             TRADITIONAL VS. MICRO FRENCH ON SHORT NAILS     │
├──────────────────────────────┬──────────────────────────────┤
│   TRADITIONAL FRENCH TIP     │      MICRO FRENCH TIP        │
│   (Overwhelms Short Bed)     │      (Elongates Short Bed)   │
│                              │                              │
│       ╭──────────────╮       │       ╭──────────────╮       │
│      ╱  ████████████  ╲      │      ╱   ──────────   ╲ <── Tip: 10-15%
│     │   ████████████   │     │     │                │       (Hairline)
│     │   (Covers 40%+)  │     │     │   EXPANSIVE    │
│     │                  │     │     │   NAIL BED     │ <── Base: 85-90%
│     │   Cramped Bed    │     │     │   (Elongated)  │       (Semi-Sheer)
│     ╰────────────────╯       │     ╰────────────────╯
└──────────────────────────────┴──────────────────────────────┘
The Proportional Challenge: Why Standard French Tips Fail on Short Nails
The classic French manicure was originally popularized on medium-to-long nail extensions, where ample white free edge allows for a broad, dramatic crescent. When that same proportional width is painted onto short natural nails or short nail beds, the visual balance collapses:
- Horizontal Truncation: A thick white stroke acts as a visual barrier. Instead of drawing the eye upward, it slices across the widest section of the nail, drawing attention to where the nail ends.
- Cramped Negative Space: When a tip covers more than a third of the nail, the remaining base polish looks squished against the cuticle, making nail beds appear shorter than they actually are.
- Mismatched Smile Arcs: Stamping a flat, straight line across a curved natural edge creates blunt corners at the lateral sidewalls, resulting in an unnatural "blocky" appearance.
To make French tips flatter short nails, every design decision must revolve around three levers: line width, smile-line curvature, and contrast balance.
Lever 1: Mastering Line Width (The 10–15% Rule)
On short nails, tip thickness should never be determined by the physical depth of your natural white free edge. If your natural free edge begins low on the nail bed, tracing it directly will create an overly thick band.
Instead, adopt the 10–15% rule: the tip line should occupy no more than 10% to 15% of the visible nail plate's total vertical height.
- Micro French (Skinny French): A hairline band measuring approximately 0.5 mm to 1.5 mm painted along the outermost perimeter. This preserves maximum surface area for the base color, giving the illusion of extended nail bed length.
- Tapered Edge: The line should maintain its slender width across the center and taper even finer as it reaches the lateral sidewalls. If the color thickens as it enters the nail grooves, the finger looks broader.
- Solid Free-Edge Masking: If your natural smile line sits unevenly below the painted micro-tip, use a semi-sheer or medium-coverage neutral base coat to soften and conceal your natural free edge before applying the tip color.
Lever 2: Aligning Smile-Line Curvature with Nail Shape
The smile line—the curved boundary separating the nail bed from the tip—must harmonize with the shape of your free edge. Forcing a mismatched arc distorts the symmetry of your fingers.
┌─────────────────────────────────────────────────────────────────────────┐
│               SMILE-LINE CURVATURE BY SHORT NAIL SHAPE                  │
├─────────────────┬─────────────────┬─────────────────┬───────────────────┤
│   ROUND NAIL    │   SQUOVAL NAIL  │   SHORT OVAL    │   SQUARE NAIL     │
│                 │                 │                 │                   │
│      ╭───╮      │     ╭─────╮     │      ╭───╮      │     ┌─────┐       │
│     ╱ ─── ╲     │    │  ───  │    │     ╱  -  ╲     │     │ --- │       │
│    │       │    │    │       │    │    │       │    │     │     │       │
│  Continuous Arc │ Soft Lateral    │ Steep Center    │ Flat Center,      │
│  Matches Edge   │ Droop + Flat    │ Crest           │ Crisp Corners     │
└─────────────────┴─────────────────┴─────────────────┴───────────────────┘
1. Round Nails
- Shape Profile: The lateral sides follow the natural finger contour and curve smoothly at the free edge without sharp corners.
- Smile-Line Strategy: Paint a continuous, gentle parabolic curve that mirrors the contour of your fingertip exactly. Avoid flattening the center, which makes round tips look uneven.
2. Squoval Nails (Soft Square)
- Shape Profile: A straight horizontal free edge paired with rounded, softened corners.
- Smile-Line Strategy: Keep the center 60% of the tip almost straight across, then sweep the edges down into a subtle curve at the corners. This maintains the clean structure of a square while softening the transitions.
3. Short Oval Nails
- Shape Profile: Gently tapered sidewalls terminating in a rounded arch.
- Smile-Line Strategy: A deeper smile line that curves higher on the lateral margins and crests gracefully in the center. An exaggerated shallow line will flatten the oval aesthetic.
4. Square Nails
- Shape Profile: Straight sidewalls with a crisp, 90-degree horizontal top edge.
- Smile-Line Strategy: A crisp, uniform horizontal band across the top with a subtle 90-degree return along the outer side edge. The line must remain razor-thin; even minor thickness on short square nails creates a paddle-like effect.
Lever 3: Calibrating Base and Tip Contrast
The colors you select dictate how the eye perceives the length of your fingers. High contrast creates bold graphic separation, while soft contrast provides gentle visual elongation.
- Base Formulation: Swap clear base coats for milky, translucent camouflage shades. A milky pink, warm peach-nude, or sheer beige masks underlying nail plate imperfections and provides a clean canvas.
- High Contrast (Stark White vs. Sheer Pink): Classic crisp white tips produce a modern, graphic micro French. Because stark white draws immediate focus, the line work must be exceptionally precise; any wobble is readily visible.
- Muted & Tonal Contrast: Substituting harsh white with creamy off-white, soft vanilla, or warm taupe reduces the stark horizontal cut. The eye travels smoothly across the nail without abrupt interruption.
- Color Accents on Short Tips: Vibrant hues like cobalt blue, matcha green, terracotta, or deep espresso work exceptionally well on micro tips. Because the band is thin, dark or saturated colors deliver personality without overwhelming a compact nail bed.
Proportional Comparison Matrix for Short Nails
Use this reference table to match your nail bed length, preferred shape, and tip dimensions:
| Nail Bed Type | Recommended Nail Shape | Ideal Tip Style | Recommended Tip Width | Base Coat Strategy |
|---|---|---|---|---|
| Short / Compact Bed | Short Oval or Soft Round | Micro French (Hairline) | 0.5 mm – 1.0 mm (approx. 10%) | Semi-opaque milky neutral to optically extend bed past hyponychium |
| Wide / Fan-Shaped Bed | Soft Squoval or Tapered Oval | Deep Smile Micro French | 1.0 mm – 1.5 mm, tapering at walls | Warm sheer beige; avoid stark white to soften width |
| Standard Bed (Short Length) | Squoval or Round | Classic Micro French | 1.0 mm – 1.5 mm (approx. 15%) | Sheer rose jelly with crisp white or pastel accent |
| Uneven / Asymmetric Beds | Round | Floating Micro Line or Color Tip | 0.8 mm – 1.2 mm | Camouflage nude matched closely to natural nail plate tone |
6 Flattering French Tip Variations Engineered for Short Nails
Adapting a French manicure to limited canvas space does not mean you are confined to a single look. These six variations maximize visual balance on short nails:
┌────────────────────────────────────────────────────────────────────────┐
│                   6 SHORT-NAIL FRENCH VARIATIONS                       │
├───────────────────┬───────────────────┬────────────────────────────────┤
│ 1. Classic Micro  │ 2. Deep-Curve Arc │ 3. Reverse (Cuticle) Cuff      │
│     ╭───-───╮     │     ╭───^───╮     │          ╭───────╮             │
│    │         │    │    │         │    │         │         │            │
│    │         │    │    │         │    │          ╲ ───── ╱             │
│ 0.5-1mm Hairline  │ Elongating Center │ Frame Base, Free the Edge      │
├───────────────────┼───────────────────┼────────────────────────────────┤
│ 4. Diagonal Split │ 5. Tonal Pastel   │ 6. Chrome Glaze Edge           │
│     ╭───/───╮     │     ╭───-───╮     │          ╭───*───╮             │
│    │   /     │    │    │ (Sage/Taupe) │         │ (Reflective)         │
│    │  /      │    │    │         │    │         │         │            │
│ Directional Flow  │ Low-Contrast Flow │ Shimmer Without Bulk           │
└───────────────────┴───────────────────┴────────────────────────────────┘
1. The Classic Micro French (Hairline French)
- The Design: An ultra-slender, 0.75 mm band of crisp white traced along the extreme perimeter of a round or squoval nail over a sheer pink jelly base.
- Why It Works: It retains the iconic French aesthetic while keeping over 85% of the nail plate open, preventing the finger from looking truncated.
- Key Trade-off: Requires high brush precision; small deviations in width are noticeable on a clean white edge.
2. The Deep-Curved Micro French
- The Design: Instead of following the natural smile line, the tip begins higher up the lateral sidewalls and curves gracefully over the free edge of an oval or almond-tapered short nail.
- Why It Works: The upward sweep along the sides draws the eye vertically, counteracting the natural stubbiness of short nail beds.
- Key Trade-off: If drawn too steeply, it can look like an archway rather than a French tip.
3. The Reverse Micro French (Cuticle Cuff)
- The Design: A thin crescent traced along the proximal nail fold (cuticle line) rather than the free edge, leaving the tip bare or solid.
- Why It Works: Shifting the decorative detail to the base leaves the free edge uncluttered. This is an exceptional solution for nails worn flush to the fingertip where no free edge exists.
- Key Trade-off: Natural nail regrowth shows faster at the cuticle margin, requiring maintenance within 10 to 14 days.
4. The Diagonal Negative-Space French
- The Design: A slim diagonal stroke sweeping from midway down one sidewall up across the opposite corner of the free edge.
- Why It Works: Diagonal geometry leads the viewer's eye along a longer axis across the nail, creating dynamic interest without cutting the plate horizontally.
- Key Trade-off: Asymmetric lines must be angled consistently across all ten fingers to look intentional rather than accidental.
5. The Tonal Earthy/Pastel Micro Tip
- The Design: Replacing white with muted sage green, butter yellow, dusty lavender, or chocolate brown over a tonal semi-sheer base.
- Why It Works: Soft, low-contrast tones blend harmoniously with natural skin tones, avoiding the harsh graphic break that stark white can cause on short nails.
- Key Trade-off: Very pale pastels can look washed out under dim indoor lighting if the base color is overly opaque.
6. The Glazed Chrome Micro Edge
- The Design: A sheer neutral base topped with an ultra-thin silver, gold, or pearlescent chrome powder line rubbed solely onto the free edge.
- Why It Works: The reflective chrome catches the light along the perimeter, defining the nail contour without requiring opaque pigment that blocks out space.
- Key Trade-off: Chrome powders require a dedicated non-wipe gel topcoat and precise buffing; excess chrome can scatter across the base coat if not cleaned carefully.
Step-by-Step Planning and Execution Workflow
Whether you are painting at home or directing your nail technician at a salon, follow this sequential workflow to ensure clean proportions:
┌────────────────────────────────────────────────────────────────────────┐
│                   SHORT-NAIL FRENCH WORKFLOW SEQUENCE                  │
└────────────────────────────────────────────────────────────────────────┘
   [Step 1: Prep & Free Edge Audit] ─── Assess natural bed vs. hyponychium
                  │
   [Step 2: Base Tone Calibration] ──── Apply semi-sheer camouflaging base
                  │
   [Step 3: Establish Center Guide] ─── Mark center 0.5-1mm crest point
                  │
   [Step 4: Sweep Lateral Wings] ────── Connect sidewalls with fine liner
                  │
   [Step 5: Topcoat Seal & Inspect] ─── Cap edge without pooling pigment
Step 1: Assess Free-Edge Depth and Shape
Before picking up polish, inspect the underside of your nails. Determine where your hyponychium (the skin under the nail plate) attaches. If your nails are clipped flush to the fingertip, shape them into a soft squoval or round outline. Do not attempt an aggressive almond taper on nails without sufficient free edge, as filing deep into the sidewalls weakens the structure.
Step 2: Neutralize the Base Plate
Apply one to two thin coats of a semi-sheer camouflage base. The base should blur the line between your pink nail bed and your white free edge. This step is critical: it prevents your natural, uneven free edge from showing beneath your painted micro-line.
Step 3: Map the Smile Line with a Fine Striper
Do not use the wide brush provided inside the polish bottle. Use an independent, long-bristle nail art detailer (size 00 or 7 mm–9 mm striper brush).
- Place a microscopic dot of tip color at the exact vertical center of the free edge, establishing your 1 mm height limit.
- From the left lateral sidewall, draw a smooth, continuous hairline stroke toward the center dot.
- Repeat from the right sidewall to meet in the middle.
Step 4: Clean and Refine the Smile Arc
Dip a flat, angled cleanup brush into acetone or alcohol (depending on whether you are working with lacquer or gel). Clean up any slight wobble along the lower edge of your tip stroke. Ensure the line is crisp and tapers neatly into the sidewall fold.
Step 5: Seal the Free Edge Without Pooling
Apply a high-gloss topcoat. When working on short nails, technicians often flood the free edge, causing topcoat to pool under the fingertip or form a thick ridge at the tip. Apply a thin layer across the surface and lightly run the brush across the leading edge to cap it smoothly.
Realistic Failure Modes and How to Correct Them
Even experienced clients encounter issues when translating inspiration photos to short nails. Here are common failure points and their operational fixes:
┌─────────────────────────────────────────────────────────────────────────┐
│               FAILURE MODES & RAPID OPERATIONAL CORRECTIONS             │
├──────────────────────────┬──────────────────────┬───────────────────────┤
│ Failure Mode             │ Root Cause           │ Corrective Action     │
├──────────────────────────┼──────────────────────┼───────────────────────┤
│ "Chunky / Stubby" Look   │ Tip band exceeds     │ Wipe line down to     │
│                          │ 20% of nail surface  │ 1mm with detail brush │
├──────────────────────────┼──────────────────────┼───────────────────────┤
│ Shadow Line Showing      │ Natural smile line   │ Apply semi-opaque     │
│ Through Base             │ visible below paint  │ camouflage base first │
├──────────────────────────┼──────────────────────┼───────────────────────┤
│ Bulky Free Edge          │ Topcoat pooling      │ Light brush swipe,    │
│                          │ at front perimeter   │ avoid thick dipping   │
├──────────────────────────┼──────────────────────┼───────────────────────┤
│ Uneven Sidewall Heights  │ Drawing freehand     │ Anchor center guide   │
│                          │ without center mark  │ dot before sweeping   │
└──────────────────────────┴──────────────────────┴───────────────────────┘
Failure Mode 1: The "Dipped" or Heavy-Tipped Look
- Symptom: The tips look thick, as though the fingertips were dipped into white paint, making the fingers appear truncated.
- Why It Happens: The technician used the standard bottle brush or attempted to cover the entire natural white free edge on a deep nail bed.
- Correction: Request a dedicated micro French using a 00 liner brush. If the natural free edge is wide, use a more opaque base color to hide the natural transition zone, allowing the painted tip to stay ultra-thin.
Failure Mode 2: Sidewall Disconnect
- Symptom: The tip line stops abruptly before reaching the edge of the finger, leaving a gap near the lateral skin folds.
- Why It Happens: Fear of flooding the skin causes the artist to stop short of the sidewall.
- Correction: Gently press down the lateral skin fold with your opposite thumb while painting or ask your technician to pull back the side tissue to guide the stroke fully into the perimeter groove.
Failure Mode 3: Jagged or Bleeding Smile Lines
- Symptom: The line between the base color and the tip color feathers or appears wavy.
- Why It Happens: The base coat was not sufficiently dry (with regular lacquer) or the dispersion layer caused the tip gel to run before curing.
- Correction: If using gel, wipe the tacky dispersion layer off the cured base coat with alcohol before painting your French lines, or flash-cure each finger for 10 seconds immediately after painting.
Digital Previews and Salon Communication
One of the most persistent frustrations expressed in manicure communities is the gap between saved reference photos and real salon execution. Inspiration photos on social media are almost universally photographed on long, professionally sculpted extensions with elongated nail beds.
┌────────────────────────────────────────────────────────────────────────┐
│                   INSPIRATION-TO-SALON BRIDGE WORKFLOW                 │
└────────────────────────────────────────────────────────────────────────┘
   [Social Media Inspiration] ──> Often on long extensions / pro hands
                  │
   [Digital Adaptation Step] ───> Use NailMoodLab AI Studio to test
                                 micro-lines on short shapes & hand photos
                  │
   [Export Visual Aid] ─────────> Download preview or copy share URL
                  │
   [Salon Chair Alignment] ─────> Show exact reference & state boundaries
Using NailMoodLab for Pre-Appointment Planning
Before sitting down at the salon or investing in gel products, you can explore proportions digitally using NailMoodLab:
- Prompt-Based Ideation: Generate short nail concepts by specifying parameters such as "ultra-thin micro French, short squoval nails, milky nude base with olive green tip."
- Hand-Photo Shape Suggestions: Upload a clear photo of your own hand to evaluate how round, squoval, or oval outlines sit against your actual knuckle structure and finger width.
- Two-Image Virtual Try-On: Test generated design concepts directly against your uploaded hand photo to visualize how a micro-band looks on your specific nail bed dimensions.
- Export and Share: Regenerate, download, share, or copy the direct URL of approved previews to keep on your phone for reference.
Crucial Boundaries of Digital Previews
While digital studios provide exceptional creative clarity, it is essential to understand their operational boundaries:
- Inspirational, Not Diagnostic: Previews generate visual styling concepts; they do not measure nail plate curve, thickness, or lateral stress points.
- Salon Nuance: A digital preview cannot guarantee that a salon technician has the specific pigment density, striping brushes, or manual dexterity to replicate every millimeter identically.
- Commercial Status: Paid subscription checkout is currently disabled on NailMoodLab. You can access free generative design tools, shape suggestions, and try-on features directly in your browser without entering billing credentials.
Exact Phrasing for Your Salon Appointment
To eliminate misunderstandings with your nail technician, use specific, professional wording:
- Instead of: "I want a French manicure, but my nails are short."
- Say this: "I would like a micro French on my natural length. Please keep the smile line very thin—about one millimeter—so it doesn't shorten my nail beds. Can we use a semi-sheer milky base to even out my natural nail tone before painting the tip?"
- Show this: Present your exported NailMoodLab preview on your phone to demonstrate the exact proportion between the base area and the tip stroke.
Pre-Manicure Client Checklist
Review this checklist before your appointment or DIY session:
- [ ] Length & Shape Decided: Selected a short squoval, round, or soft oval shape based on existing free edge.
- [ ] Base Tone Matched: Picked a sheer neutral, rose jelly, or milky camouflage base that complements skin undertone.
- [ ] Width Threshold Set: Confirmed tip width will remain under 15% of total nail plate height (0.5 mm to 1.5 mm).
- [ ] Contrast Level Selected: Chosen between high-contrast crisp white, low-contrast tonal cream, or colorful micro accents.
- [ ] Correct Brushes Ready: Sourced a dedicated 00 long liner brush rather than relying on bottle brushes.
- [ ] Visual Reference Saved: Downloaded an approved preview from NailMoodLab or copied the share URL to phone.
- [ ] Expectations Aligned: Acknowledged that natural finger anatomy and free-edge depth dictate final symmetry.
Frequently Asked Questions
Can I get French tips if my nails are bitten down or have zero free edge?
Yes, but you should opt for a Reverse Micro French (cuticle cuff) or an ultra-fine perimeter line painted on a rounded shape. When there is zero free edge, attempting to paint a traditional white band across the tip can result in polish adhering to the surrounding hyponychium skin, leading to premature chipping. A camouflage neutral base combined with a cuticle-hugging metallic or color line flatters zero-length nails without stressing the skin fold.
Why do my short French tips make my fingers look wider?
Fingers appear wider when the French tip is drawn too thick or straight across. A broad horizontal bar visually splits the nail into two short halves. To correct this, slim the tip to a 1 mm micro-line and give the smile line a gentle upward curve toward the lateral corners.
Are colored micro tips better than white tips on short nails?
Colored micro tips are often more forgiving than stark white. Deep tones (like navy, burgundy, or forest green) and soft earth tones (like olive or mocha) provide a defined, sophisticated edge without the sharp, abrupt contrast that stark white produces against pink nail beds.
How long does a micro French manicure last on short natural nails?
With gel polish, a micro French on short natural nails typically lasts 2 to 3 weeks. Because the painted tip line is extremely thin, minor tip wear at the edge is far less noticeable than with a thick white French band. When using regular lacquer, apply a fresh coat of high-gloss topcoat every three days to protect the leading edge.
Does NailMoodLab require a paid subscription to generate nail ideas?
No. Paid subscription checkout is currently unavailable. Users can explore prompt-based design concepts, review nail shape recommendations, and test two-image virtual try-ons directly on the platform without setting up a paid account or providing payment details.
Take the Next Step in Your Manicure Planning
Short nails offer durability, low maintenance, and effortless everyday comfort. You do not need long acrylic extensions to enjoy the timeless elegance of a French manicure—you simply need to scale the proportions to honor your natural canvas.
Put these design principles into action before your next manicure: explore color pairings, test squoval versus round perimeters, and generate balanced micro-line concepts in NailMoodLab. Save your favorite visual preview, take it to your nail professional as a clear discussion aid, and enjoy a polished, elongating French manicure tailored specifically to your natural nails. Once verified subscription features become available, you can integrate NailMoodLab into your recurring styling routine.
Referenced Guidelines and Community Sources
- Reddit r/Nails Discussion on Nail Shapes and Hand Proportions — Community troubleshooting on matching natural nail perimeters to finger anatomy.
- Reddit r/AllNails Community Thread on Salon Reference Disconnects — Real-world discussions regarding salon execution discrepancies and reference communication.
- Reddit r/SomebodyMakeThis Thread on Digital Nail Shape Planning — Demand for virtual nail shape exploration and realistic visual planning tools.