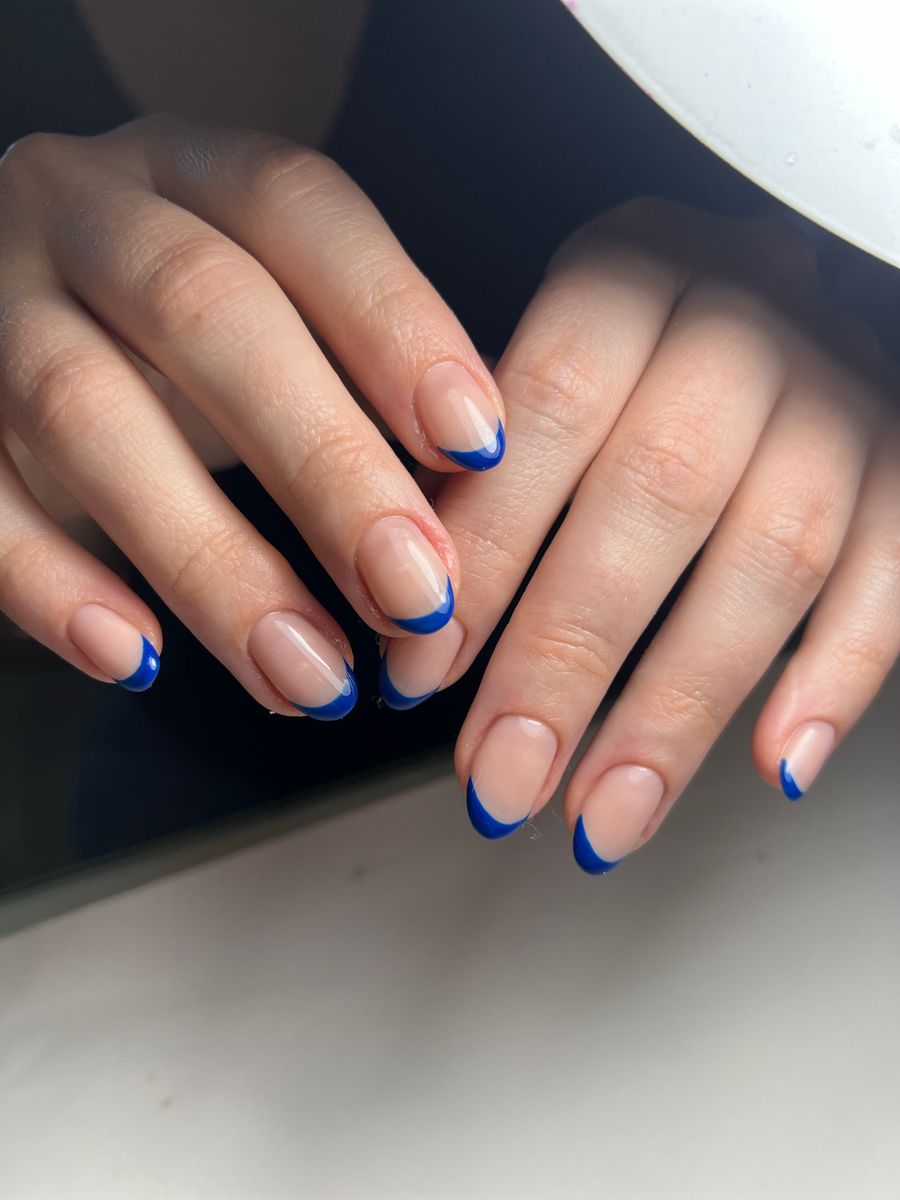
A useful hand photo for nail try-on shows the nails clearly under even light, with a relaxed palm-down pose, slight finger separation, and a simple background. Keep the camera approximately above the hand, avoid glare and blur, and leave enough room around the fingertips. Save the original so you can check whether the generated preview preserves your hand and nail boundaries.
The photo does not need to look like a beauty campaign. It needs to be easy to interpret and repeat. Better input makes the preview easier to judge, but no photograph guarantees a perfect AI result or a physically achievable manicure.
Choose a quiet background
Use a plain surface that contrasts enough with your hand to make its outline visible. A neutral tabletop or uncluttered sheet of material can work as a practical starting point.
Avoid busy patterns, reflective objects, and overlapping items near the fingertips. These can distract you when comparing designs and make it harder to see whether the preview has preserved the original boundaries.
Keep unnecessary jewelry or props out of the comparison if they dominate the image. You do not need to remove meaningful personal details solely to create an artificial-looking hand; the aim is a clear view of the nails.
Check the background before uploading. A receipt, address label, or screen in the frame may include information unrelated to the task. Crop or reframe to keep the photo focused on the hand.
Use soft, even light
Place the hand near gentle window light or another evenly lit area. Avoid direct sunlight that creates very bright reflections on some nails and deep shadows on others.
If glare hides the surface, shift the hand or camera slightly rather than making a large editing correction afterward. You want to see the nail edges and the existing surface clearly.
Watch for mixed lighting. A window combined with a strongly colored indoor light can make different parts of the hand appear different shades. Use a simpler lighting setup where practical.
Do not judge a polish color from the preview as an exact real-world match. Light, the camera, and the display all influence appearance. Consistent input is useful for comparison, not a color-measurement guarantee.
Position the hand without forcing the pose
Rest the hand palm down in a relaxed position with the nail surfaces visible. Separate the fingers slightly so their outlines do not overlap.
Do not spread the fingers so widely that the pose becomes strained or unlike your normal hand position. A natural, clear arrangement is a better reference for an everyday visual comparison.
Pay attention to the thumb. It can rotate away from the camera and hide its nail even when the other nails are visible. Adjust the angle comfortably or use another photo if the tool's current workflow allows and the thumb needs separate attention.
Avoid holding an object that covers nail edges. A perfume bottle or cup may look attractive in a manicure photograph but is less useful when the purpose is to inspect every nail boundary.
Keep the camera angle straightforward
Start with the camera roughly above the hand rather than very close to the fingertips at a steep angle. Strong perspective can make nearby fingers appear much larger and distant nails harder to see.
Move the camera back enough to include the hand comfortably, then frame without excessive empty space. Do not crop away the tips or side edges of the nails you want to preview.
Keep the camera steady and clean the lens. Tap to focus on the nails if your phone supports it. Take a small set of frames and choose the clearest rather than assuming the first one is sharp.
Avoid relying on heavy portrait blur. If it softens some nails or creates strange edges around fingers, use a normal camera mode. The preview needs visible information more than a stylized background.
Check the photo before using an allowance
Inspect the original at a normal size and then closer up. Look for focus, glare, hidden edges, and overlapping fingers. If you cannot clearly identify the nail surface yourself, retake the photo before expecting the tool to interpret it.
| Input issue | Why it complicates review | Better next step |
|---|---|---|
| Bright glare over a nail | Hides surface and boundary detail | Move slightly relative to the light |
| Motion blur | Makes nail edges uncertain | Stabilize the camera and retake |
| Overlapping fingers | Obscures individual outlines | Relax and separate them slightly |
| Strong perspective | Changes apparent proportions | Use a more direct camera angle |
| Cropped fingertips | Removes information the preview needs | Reframe with space around the hand |
| Heavy filter or retouching | Alters the baseline you want to compare | Use the unfiltered original |
Retaking a simple photo is often more useful than repeatedly regenerating from an unclear input. Keep the best source image so future comparisons start from the same baseline.
Preserve the original appearance
Avoid reshaping fingers, smoothing nail boundaries, or changing the hand's proportions before try-on. Those edits make it harder to judge whether the generated design relates to your real hand.
A modest crop can remove distractions, but do not crop so tightly that the nail edges lose context. If the image needs major exposure or color repair, a new capture under better light may be a clearer solution.
You do not need to alter or remove an existing manicure solely to follow this photo guide. Use the current service appropriately and ask the nail professional about any real changes. If an existing pattern makes the preview difficult to interpret, note that limitation rather than attempting a service change for the photograph.
Keep the original file separate from any preview or edited copy. Clear filenames help prevent accidentally reusing an AI result as though it were a new photograph of your hand.
Pair the hand photo with a clear design reference
NailMoodLab provides two-image virtual nail try-on. Use the clear hand photo with the design reference you want to explore. The studio also offers prompt-based generation and hand-photo nail-shape suggestions; generated designs can be regenerated, downloaded, shared, or copied by URL.
Choose a reference that makes the intended palette, pattern, and finish easy to see. A collage of several different sets may leave the desired design ambiguous.
If the reference has a very different length, note which features you actually want to keep. The color may transfer conceptually while the detailed pattern needs adaptation for a shorter canvas.
For a comparison, reuse the same hand photo and change one main design variable at a time. This makes it easier to separate a color or shape preference from differences in lighting and pose.
Review the preview against the source
Check the whole hand first. Then inspect individual nails, finger outlines, and any area where art meets skin. Look for duplicated fingers, changed proportions, shifted nail beds, or patterns that spill outside the nail.
If the output changes your hand, do not treat the altered proportions as a flattering feature of the manicure. Regenerate or choose a different input or reference when the distortion prevents a useful comparison.
A clear input reduces some ambiguity but cannot guarantee accurate output. Treat the preview as a visual proposal and keep the original beside it when deciding what you like.
The result does not diagnose nail condition, measure length, or confirm that a shape can be created on your actual nails. Those questions remain separate from the image.
Turn the preview into a consultation reference
Save the most useful result and write down the features you prefer: shape direction, approximate length preference, palette, finish, and accent placement.
Use the salon reference-photo guide to prepare the conversation. Explain that the image is a virtual concept, then ask the professional what is practical for the service you are considering.
If the preview is visually useful but contains a small artifact, identify it explicitly or select a cleaner image. Do not make the professional guess whether an accidental detail is part of your request.
Before uploading, confirm:
- Nails and fingertips are fully visible.
- The hand is relaxed and fingers do not overlap.
- Light is even and glare does not hide important detail.
- Focus and camera angle keep boundaries clear.
- The background is simple and free of irrelevant information.
- The original file is preserved for comparison.
Take one repeatable photo, then explore a design with NailMoodLab virtual try-on. For regular planning, review your current account allowance and available plan details. Consider a future purchase only when checkout becomes available and the offer fits your actual use.